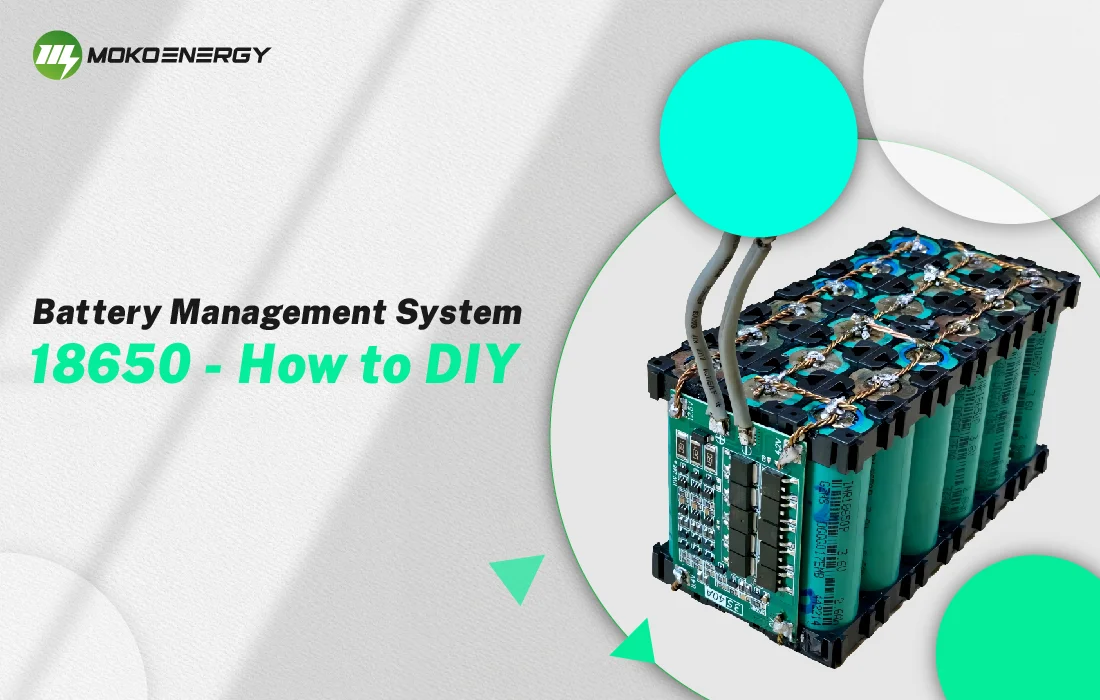
For anyone who is a DIY enthusiast and requires a custom battery pack for their projects, then look no further than the powerful and versatile 18650 lithium-ion cells, coupled with a BMS, and you have a safe and long-lasting high-capacity source of power. In this tutorial, we will guide you step-by-step in the process of building an 18650 battery pack with a Battery Management System.
Step1: Prepare Materials and Tools

Before we dive into the assembly process, let’s gather all the necessary materials and tools. Here’s what you’ll need:
| Materials | Tools |
|---|---|
| 18650 lithium-ion cells (Choose reputable brands) | Spot welder |
| Battery management system (BMS) compatible with your cell configuration | Wire cutters and strippers |
| Nickel strips for cell connections | Multimeter |
| Heat shrink tubing (optional) | Soldering iron (optional) |
| Suitable enclosure or casing | Safety gear (gloves, goggles) |
Tip: Always prioritize quality when sourcing your materials, especially the 18650 cells and BMS, to ensure safety and longevity.
Step 2: Assemble The 18650 Cells

Now that you have everything ready, it’s time to start assembling your 18650 battery pack. Follow these steps:
1. Measure and cut nickel strips: Determine the required length of nickel strips based on your cell configuration (parallel, series, or combination). Cut the strips accordingly.
2. Spot weld the nickel strips to the 18650 cells: Using your spot welder, carefully weld the nickel strips to the positive and negative terminals of each cell. Ensure a solid connection.
3. Arrange the cells in the desired configuration: Based on your project’s voltage and capacity requirements, arrange the cells in a parallel, series, or combination configuration.
4. Connect the cells using the spot-welded nickel strips: Carefully connect the cells together using the spot-welded nickel strips, following your chosen configuration.
Safety First: Always exercise caution when working with lithium-ion batteries. Wear appropriate safety gear and follow proper handling procedures.
Step3: Cell Balancing Check

Before proceeding, it’s crucial to ensure that all the cells in your pack have a consistent state of charge. This process is known as cell balancing, and it’s essential for optimal performance and safety.
1. Use a multimeter to measure the voltage of each cell individually.
2. If there are significant differences in cell voltages, you’ll need to balance them using a dedicated cell balancer or the BMS itself (if it has balancing capabilities).
3. Follow the manufacturer’s instructions for the balancing process.
Tip: Regularly balancing your cells can help extend the lifespan of your battery pack and prevent potential safety issues.
Step 4: Install with BMS

The battery management system (BMS) is a crucial component that monitors and protects your 18650 battery pack. Here’s how to install it:
1. Choose the right BMS: Select a BMS that’s compatible with your cell configuration and meets your project’s requirements (e.g., charge/discharge rates, voltage limits).
2. Connect the BMS to the battery pack: Carefully follow the manufacturer’s instructions to connect the BMS to your assembled battery pack. This typically involves soldering or using specialized connectors.
3. Secure the BMS and battery pack: Place the BMS and battery pack inside a suitable enclosure or casing, ensuring proper ventilation and heat dissipation.
Reminder: Proper BMS installation is critical for safeguarding your battery pack against overcharging, overdischarging, and other potential hazards.
Step 5: Testing and Charging
Before putting your DIY 18650 battery pack into service, it’s essential to perform thorough testing and initial charging. Follow these steps:
1. Connect to a suitable charger or power supply: Use a charger or power supply compatible with your battery pack’s voltage and current requirements.
2. Perform initial charging and monitoring: Carefully monitor the charging process, checking for any abnormalities or signs of overheating.
3. Test under different load conditions: Once fully charged, test your battery pack under various load conditions to ensure proper performance and capacity.
Safety Note: Always charge and test your battery pack in a well-ventilated area, away from any flammable materials.
Step 6: Maintenance and Troubleshooting
Proper maintenance and troubleshooting can significantly extend the lifespan and reliability of your DIY 18650 battery pack. Here are some tips:
1. Storage: Store your battery pack in a cool, dry place when not in use. Avoid extreme temperatures and humidity.
2. Periodic balancing: Regularly balance your cells to maintain a consistent state of charge across the pack.
3. Troubleshooting: If you encounter issues like low capacity, overheating, or BMS errors, consult the manufacturer’s troubleshooting guide or seek professional assistance.
By following this comprehensive guide, you’ll have all the knowledge and tools necessary to build a safe, reliable, and high-performance 18650 battery pack with BMS for your DIY projects. Embrace the DIY spirit, prioritize safety, and enjoy the satisfaction of powering your creations with a custom-built battery pack.