Electric bikes (e-bikes) have become a popular mode of transportation due to their eco-friendly nature and efficient power usage. However, ensuring that your e-bike performs optimally involves more than just choosing the right battery—it also requires a well-matched Battery Management System (BMS). In this guide, we’ll focus on the 7s BMS configuration, a key element for 24V e-bike setups, and provide a step-by-step connection guide for optimal performance and safety.
Whether you’re a DIY enthusiast looking to upgrade your e-bike or a professional in the field, this guide will help you understand the essentials of 7s BMS wiring for e-bikes.
1. What is a 7s BMS?
The term “7s BMS” refers to a battery management system designed for battery packs with 7 cells in series. Each cell typically has a nominal voltage of 3.6-3.7V. In a 7s configuration, these cells add up to create a battery pack that operates at around 24V (7 cells x 3.6V = 25.2V at full charge).
The 24v e-bike BMS regulates and monitors the battery pack’s performance, ensuring it operates safely. It helps protect the battery from common issues like overcharging, over-discharging, and short circuits, which could otherwise cause damage or pose safety risks.
Why 7s BMS is Ideal for E-Bikes
The 7s BMS is often used in e-bike battery systems for several reasons:
- Efficiency: The 7s configuration strikes a balance between voltage and energy density, which suits the power requirements of most e-bike motors.
- Compact Size: For e-bike users, portability is important. A 24V 7s BMS systemis lightweight yet powerful enough for long rides.
- Cost-Effectiveness: Compared to higher-voltage BMS systems, the 7s BMS is more affordable while still offering strong performance.
2. Understanding the 7s BMS for 24V E-Bike Systems
To understand why the 7s BMS is so critical for e-bike performance, let’s break down its components:
Series Configuration (7s): This refers to seven lithium-ion cells wired in series, which means the positive terminal of one cell is connected to the negative terminal of the next. This setup increases the voltage, providing the 24V output required for many e-bike motors.
Capacity Considerations: A typical 7s battery pack with lithium-ion cells has a voltage range of about 21V (fully discharged) to 29.4V (fully charged). This voltage range is ideal for most e-bike motors designed for 24V systems, providing a good balance between power and battery life.
Key Differences Between 7s and Other Configurations
In comparison to 3s or 4s BMS systems, the 7s BMS offers:
- Higher voltage output, making it suitable for more demanding e-bike motors.
- Better energy efficiency, providing longer ride durations for electric cyclists.
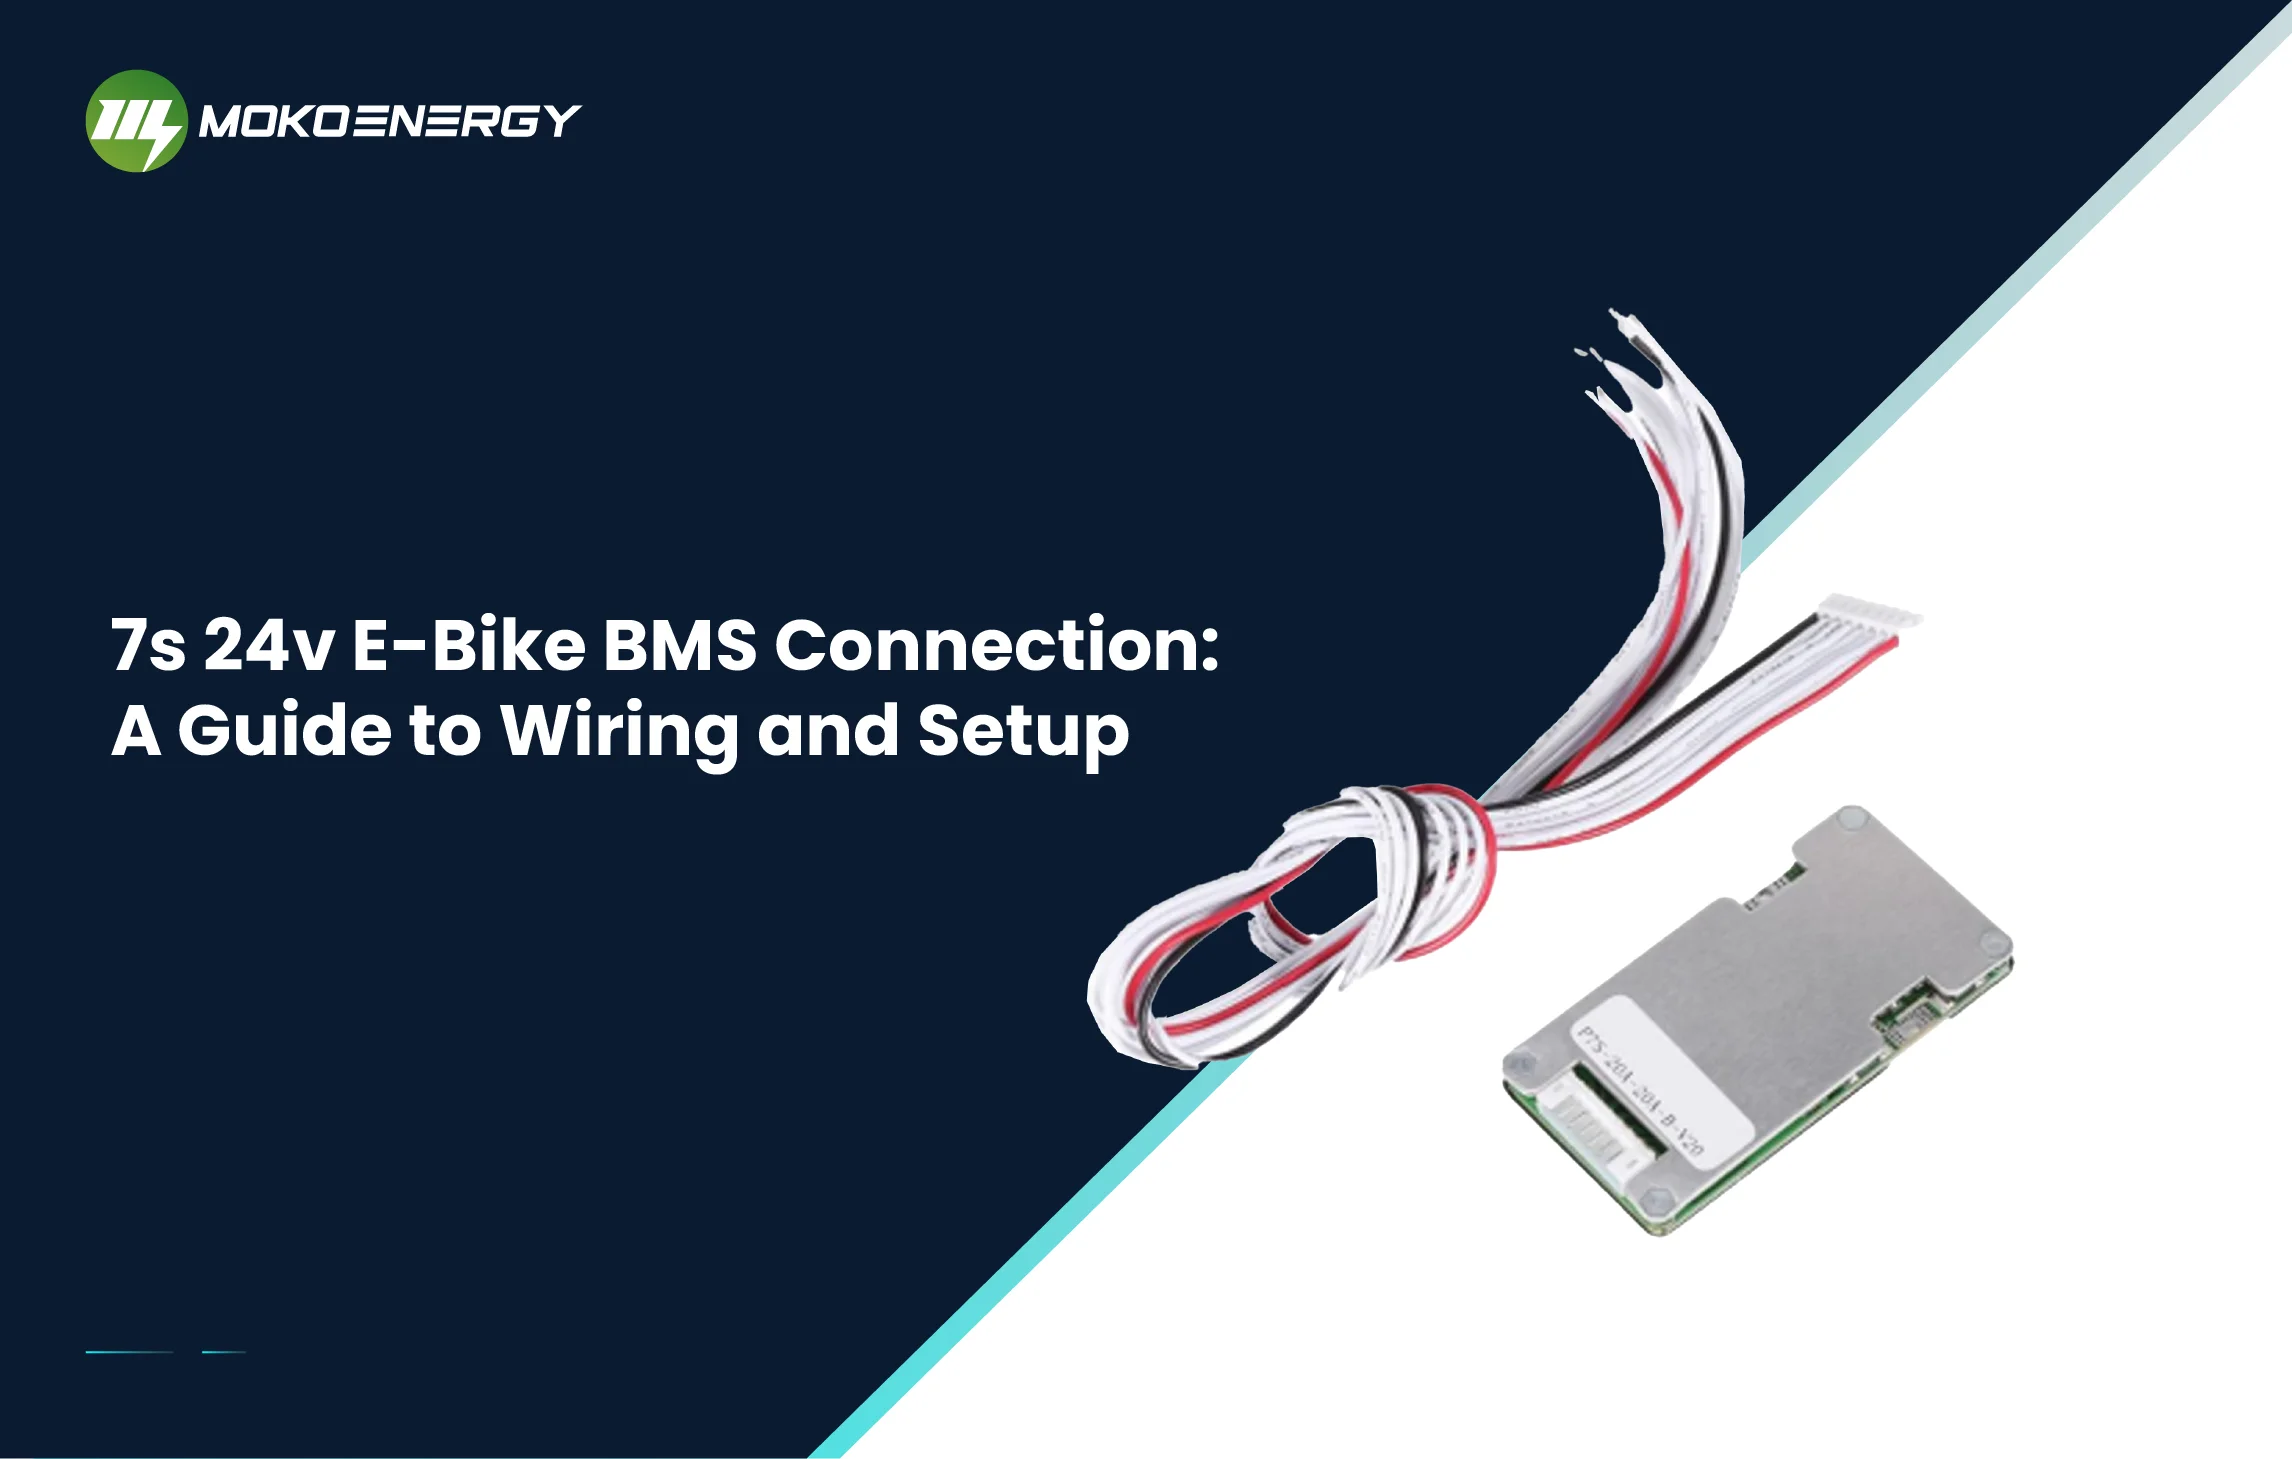
3. Components of a 7s BMS System
To successfully connect a 7s BMS to your e-bike battery pack, it’s essential to understand the main components involved:
Battery Pack (7 Cells): Seven lithium-ion cells connected in series to achieve the 24V output. These cells must have the same voltage and capacity rating for optimal performance.
BMS Unit: The BMS acts as the brain of your battery system, monitoring voltages, currents, and temperatures to protect the battery pack from unsafe conditions like overcharging, over-discharging, and short-circuiting.
Wires and Connectors: You’ll need wires and connectors to properly attach the BMS to your battery pack. Make sure they are rated for the correct current and voltage.
4. Step-by-Step Guide to Connecting a 7s 24v BMS
Now that you understand the basic components, let’s dive into the step-by-step guide for wiring a 7s BMS to a 24V e-bike battery.
Step 1: Prepare Your Tools and Ensure Safety
Before starting, gather the necessary tools:
- Soldering iron
- Heat shrink tubes
- Insulation tape
- Multimeter for voltage testing
Make sure to work in a well-ventilated area and wear safety gear, such as gloves and safety glasses, to avoid accidents. Never work on live circuits or a fully charged battery.
Step 2: Understand the Wiring Diagram
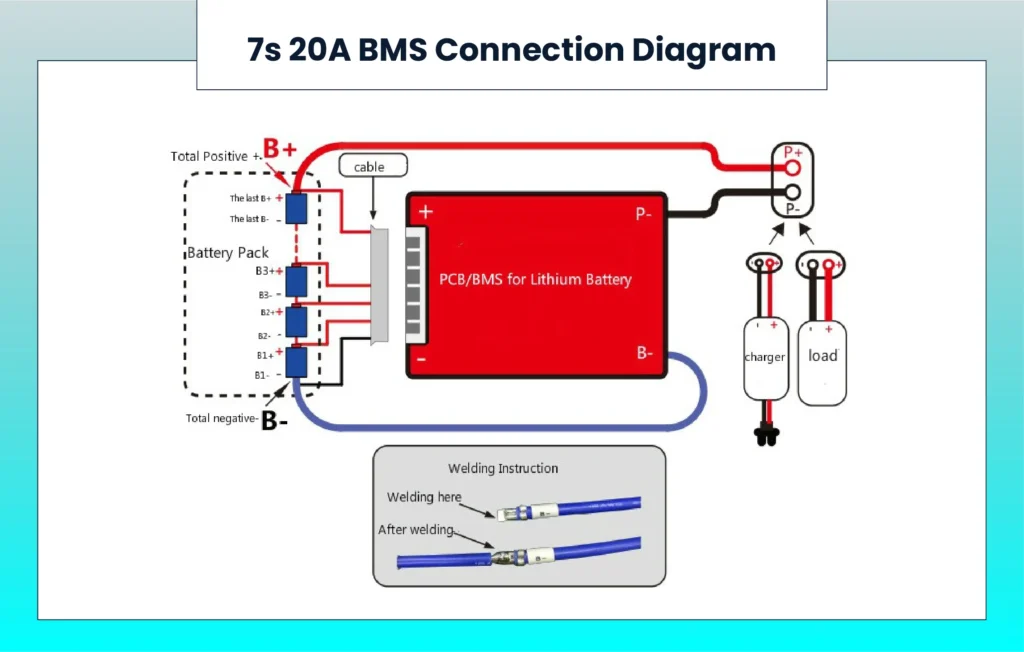
The wiring diagram for a 7s BMS can be complex, but understanding it is crucial for a successful setup. The basic idea is that each battery cell is connected to a specific pin on the BMS via balancing wires. These wires allow the BMS to monitor and manage the voltage of each individual cell.
Step 3: Connect the Cells in Series
Wire your seven lithium-ion cells in series to create a 24V pack. The positive terminal of one cell should be connected to the negative terminal of the next. After wiring all the cells, the pack’s total voltage should be approximately 25.2V.
Step 4: Attach the BMS to the Battery Pack
Follow the BMS wiring diagram for 7s BMS wiring for e-bikes:
- Connect the B- wireto the negative terminal of the battery pack.
- Connect the P- wireto the negative terminal of the load (e-bike motor or controller).
- Attach the balance leads to each cell according to the wiring diagram, ensuring that each wire corresponds to the correct cell in the pack.
Step 5: Test the Connection
Before using the system, test each connection using a multimeter. Ensure that the BMS is properly monitoring the voltage of each cell and that there are no loose or incorrect connections. This step is vital for preventing future issues with your e-bike.
5. Common Mistakes to Avoid in 7s BMS Wiring
Wiring a 7s BMS requires careful attention to detail to avoid potential issues that could compromise safety or performance. Key pitfalls include incorrectly connecting balance leads or BMS order, which can lead to inaccurate voltage readings and cell damage; choosing an unsuitable BMS that doesn’t match the 7s configuration or meet the e-bike motor’s current requirements; and neglecting crucial safety checks, such as testing connections with a multimeter before system activation. These oversights can result in malfunctions, short circuits, or even fire hazards, underscoring the importance of precision and diligence in the wiring process.
6. Benefits of Using a 7s BMS in Your E-Bike
Incorporating a 7s BMS into your e-bike system offers significant advantages in terms of performance and safety. By balancing voltage across all cells, it extends battery lifespan, potentially reducing long-term costs. The real-time monitoring capabilities of a 7s BMS enhance rider safety by preventing hazardous situations such as overcharging, overheating, or short circuits. Additionally, the improved battery management leads to more consistent e-bike performance, resulting in extended ride times and smoother acceleration. These benefits combine to create a more reliable, efficient, and enjoyable riding experience for both daily commuters and weekend enthusiasts.
7. Conclusion: Why Proper 7s BMS Connection Matters
In conclusion, wiring a 7s BMS to your 24V e-bike battery is a critical task that ensures both the performance and safety of your electric bike. From understanding the basic components of a 7s system to following the correct wiring steps, every detail matters when it comes to getting the most out of your e-bike.
Proper installation and regular maintenance of your 24v e-bike BMS will not only extend the lifespan of your battery but also give you peace of mind during every ride. For those looking to invest in high-quality BMS solutions, MOKOEnergy offers top-notch products designed to meet the needs of modern e-bikes.